REV Groups are a great way to connect with friends and family. They are also a great way for impact leaders — leaders of character looking to make a positive impact — to connect with, grow and inspire their communities.
As a group leader, you are responsible to help guide the group and report any activity that goes against the REV User Agreement. Groups should not engage in activity that goes against the REV User Agreement.
How to Create a Group on the REV Web App
Navigate to the Groups tab from the top menu bar and click Create a Group.

Add Your Group details
- Provide your Group name (required) and a description of the Group.
- Click/tap Create Group and Continue.
- Complete the following six steps to create your group.

- Customize Your Group Settings
- Select a privacy option — Public, Private or Hidden. Public is the default setting.
- Select group invitation settings, indicating who can invite others to your group. All Group Members is the default setting.
- Select activity feed settings, indicating who can post in the group activity feed. All Group Members is the default setting.
- Select Group photos settings, indicating who can manage group photos. All Group Members is the default setting.
- Select Group album settings to indicate who can manage group albums. All Group Members is the default setting.
- Group Documents to indicate who can upload documents. All Group Members is the default setting.
- Group Videos, indicating who can upload videos. All Group Members is the default setting.
- Select Group Messages settings to indicate who can send group messages. Organizers and Moderators Only is the default setting.
- Group Parent — Which group should be the parent of this group? (optional)
- Add a Group Discussion Section
- Discussion boards allow group members to communicate in a structured, bulletin-board style fashion. If you would like a group discussion section, check the box Yes, I want this group to have a discussion board.
Note: This feature can also be added or removed after you create the group.
- Upload a Group Profile Photo
- A group profile photo should represent your group. The image will display on the main group page and in search results.
- The profile photo should be a square, 300px by 300px or larger.
- Upload a Group cover photo
- The cover photo will customize the header of your group.
- For best results, upload an image that is 1950px by 450px or larger.
- Send invites to Your Group
- Select members to invite by clicking the + button next to each member.
- Customize the message of your invite.
- Click/tap Send.
- Click/tap Finish to finish creating the group.
Note: You can also invite members after you create the group.

How to Create a Group on the REV Mobile App
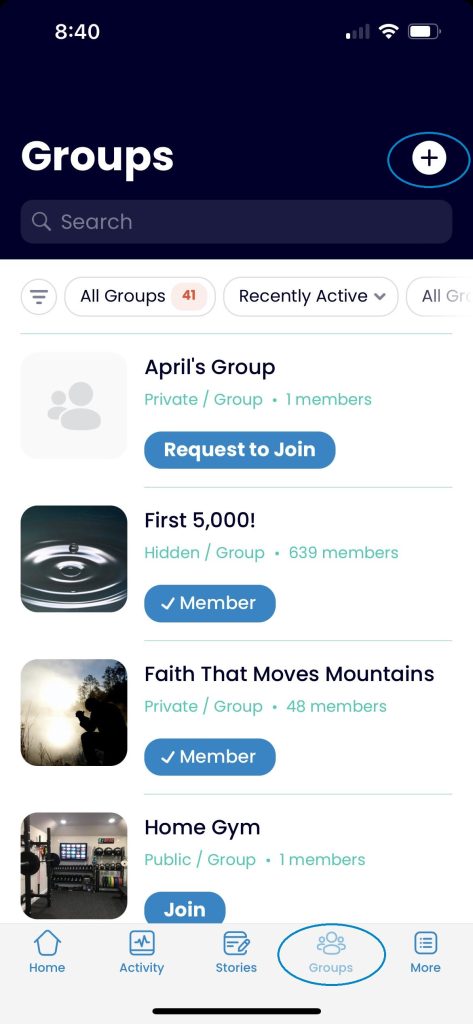
- Create a Group
Navigate to the Groups tab from the bottom menu and click + to create a new group.
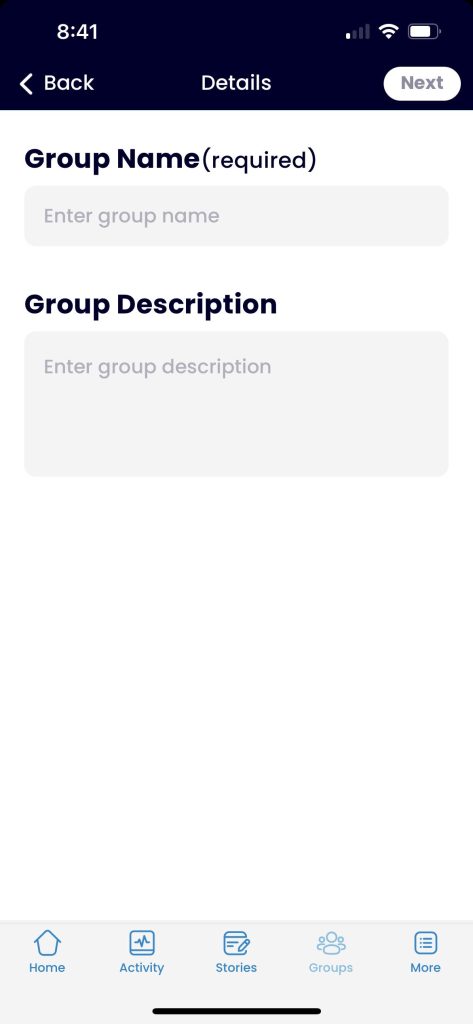
- Add Your Group Details
Provide your Group name (required) and a description of the Group and tap Next.
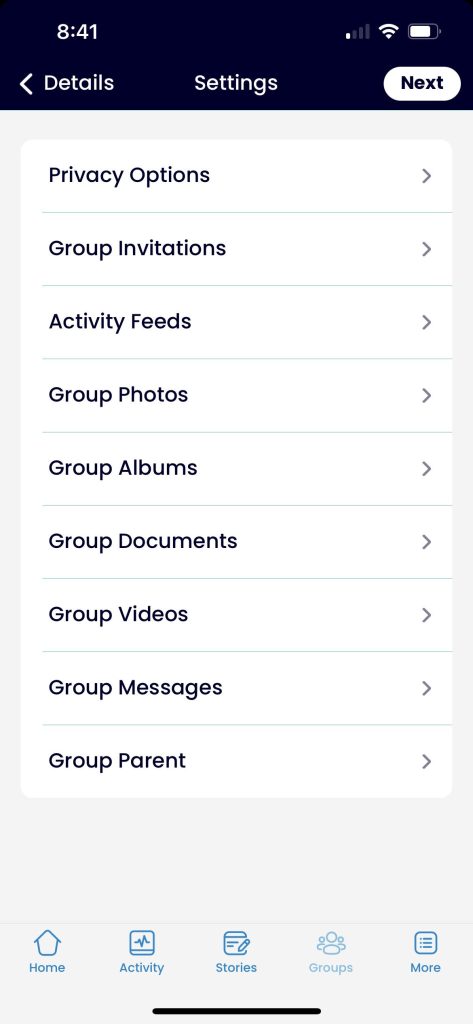
- Customize Your Group Settings
Select a privacy option — Public, Private or Hidden. Public is the default setting.
Select group invitation settings, indicating who can invite others to your group. All Group Members is the default setting.
Select activity feed settings, indicating who can post in the group activity feed. All Group Members is the default setting.
Select Group photos settings, indicating who can manage group photos. All Group Members is the default setting.
Select Group album settings to indicate who can manage group albums. All Group Members is the default setting.
Group Documents to indicate who can upload documents. All Group Members is the default setting.
Group Videos, indicating who can upload videos. All Group Members is the default setting.
Select Group Messages settings to indicate who can send group messages. Organizers and Moderators Only is the default setting.
Group Parent — Which group should be the parent of this group? (optional)
- Add a Group Discussion section
- Discussion boards allow group members to communicate in a structured, bulletin-board style fashion. If you would like a group discussion section, check the box Yes, I want this group to have a discussion board.
Note: This feature can also be added or removed after you create the group.
- Upload a Group Profile Photo
- A group profile photo should represent your group. The image will display on the main group page and in search results.
- The profile photo should be a square, 300px by 300px or larger.
- Upload a Group Cover Photo
The cover photo will customize the header of your group. For best results, upload an image that is 1950px by 450px or larger.
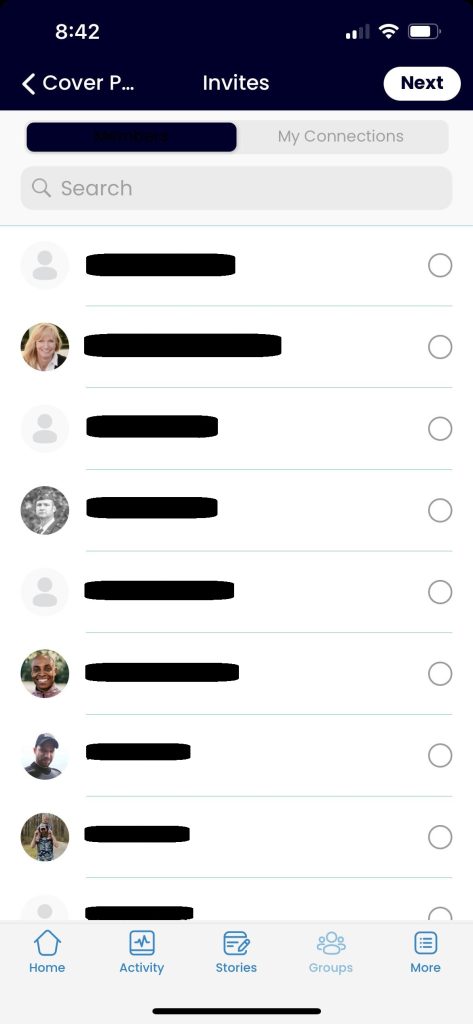
- Send invites to Your Group
Select members to invite by clicking the O button next to each member.
Click/tap Next to finish creating the group.
Note: You can also invite members after you create the group.