
Currently this feature is only available on the REV Web App
This is a step-by-step instruction for group leaders who want to connect their Zoom accounts to REV. This will allow you to schedule and host Zoom meetings within REV. The steps below are for setting up Zoom API Credentials from your Zoom account.
If you haven’t seen the article, Connecting a Zoom Account to Your Group, read it first then come back here.
Zoom Login
To use Zoom, we will need you to create an “app” in your Zoom account and connect it to your group so we can sync meeting data with Zoom. This should only take a few minutes if you already have a Zoom account. Note that cloud recordings and alternate hosts will only work if you have a “Pro” or “Business” Zoom account.
Start by going to the Zoom App Marketplace and clicking the Sign In link in the titlebar. You can sign in using your existing Zoom credentials. If you do not yet have a Zoom account, just click the Sign Up link in the titlebar. Once you have successfully signed into Zoom App Marketplace you can move to the next step.

Create App
Once you are signed in to Zoom App Marketplace, you need to build an app. You can always find the Build App link by going to Develop → Build App from the titlebar.

App Credentials
Once you get to the App Credentials page, copy the API Key and API Secret and paste them into the fields in the Zoom API Credentials section of your Group Zoom settings.
Then decide which of the Zoom users in your account should be the default host for all meetings in this group. Enter the email address into the Zoom Account Email field. The email must exist as a Host in your Zoom account.
Verification Token
Once you have entered the API Key, API Secret, and Zoom Account Email, continue to the Feature tab in Zoom. Enable Event Subscriptions and click Add new event subscription. This step is necessary to allow meeting updates from Zoom to automatically sync back into your group. Note that within the group on this site, you can also click the Sync button at any time to force a manual sync.

For Subscription Name you can enter any name you want. Copy the link at the bottom of the Zoom API Credentials section of your Group Zoom settings in REV to copy a special link, and paste that link back into Zoom in the field titled Event notification endpoint URL.

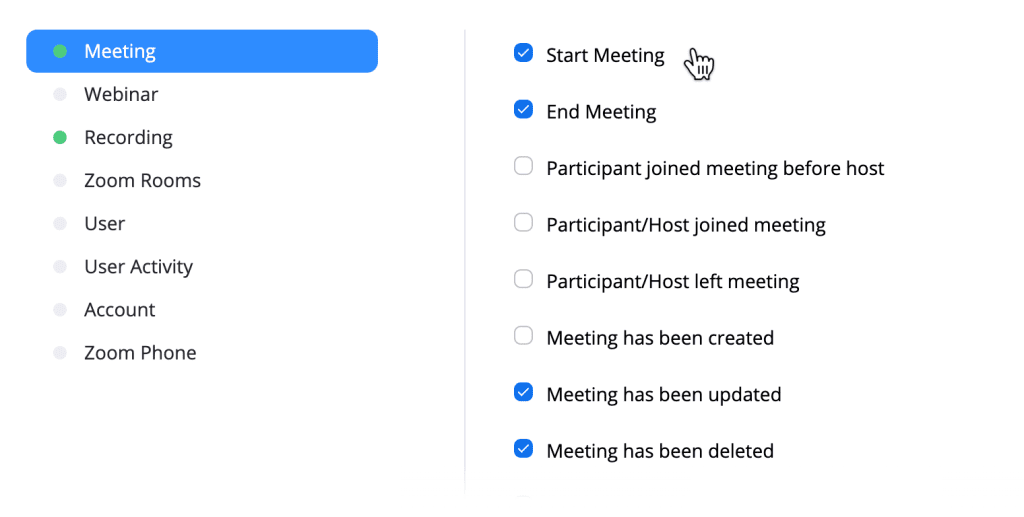
Select Meeting. Next, click the Add events button. In the popup, make sure to check the following options for Meeting: Start Meeting, End Meeting, Meeting has been updated, Meeting has been deleted.
Select Webinar. Make sure to check the following options: Start Webinar, End Webinar, Webinar has been updated, Webinar has been deleted.

Select Recording. Make sure to check: All Recordings have completed.

Click Done to close the popup. In the Event Subscriptions box, click Save.
You should now see a Verification Token created at the top of the page. Click Copy and then paste the token into the Verification Token field at the bottom of the Zoom API Credentials section of your Group Zoom settings. You’re almost done!

Finish
Now you can click Continue back at Zoom. You should see a checked message: Your app is activated on the account. At this point we are done with the Zoom website.

Make sure to click the Save button on this tab to save the data you entered. Then click the Check Connection button on the page to confirm the API was successfully connected. If everything worked you should see a new Zoom tab in your group, where you can start scheduling meetings!